Light a slat wall from inside the grooves with a strip narrow enough to sit below the slat faces, from a hidden pocket that washes across the slats, or from behind a panel stood off the wall. Never stick strip to the slat faces. Match the strip to the groove, plan many short feeds, and mock up one panel.
The architect wants the oak slats of the reception wall to glow from inside the grooves. The sample board arrives with a standard strip pushed into one groove, and it shows a row of bright dots and a strip edge catching the light. The idea is right; the strip is wrong for the slot. A slat wall is one of the most common feature walls on commercial and multifamily jobs, and it is unforgiving: every groove is a line the eye follows, so every flaw repeats across the whole wall.
Three Places the Light Can Come From
A slat wall can be lit three ways, and each gives a different wall.
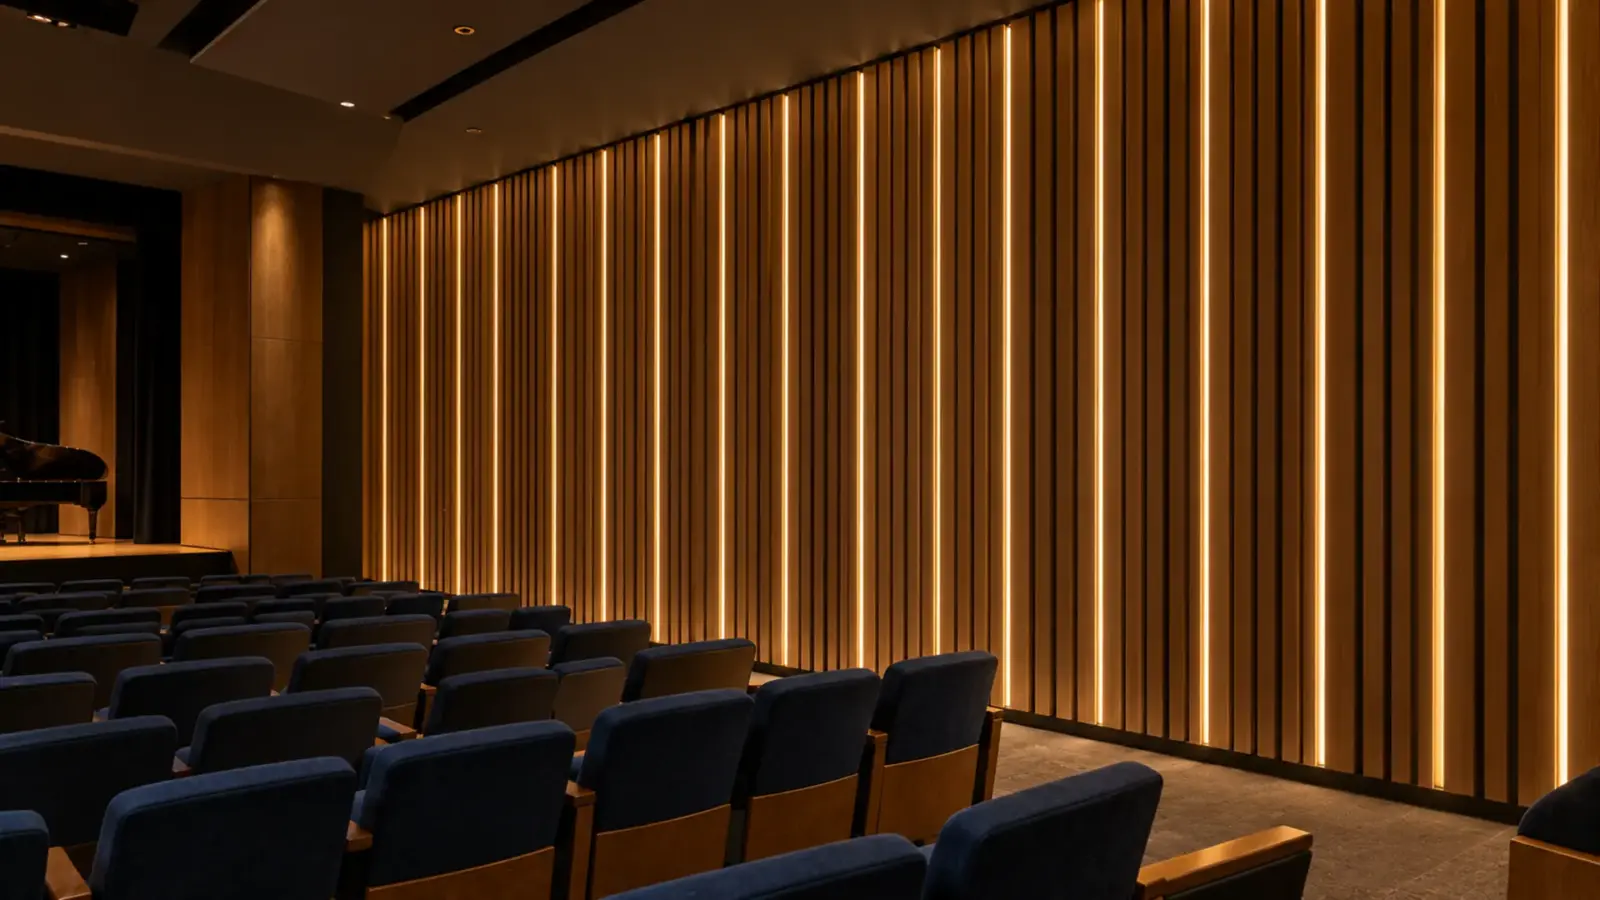
- In the grooves. A narrow strip sits in the gap between slats, so each groove becomes a line of light. The slats read as dark ribs between bright lines. This is the most graphic look and the one that shows every mistake.
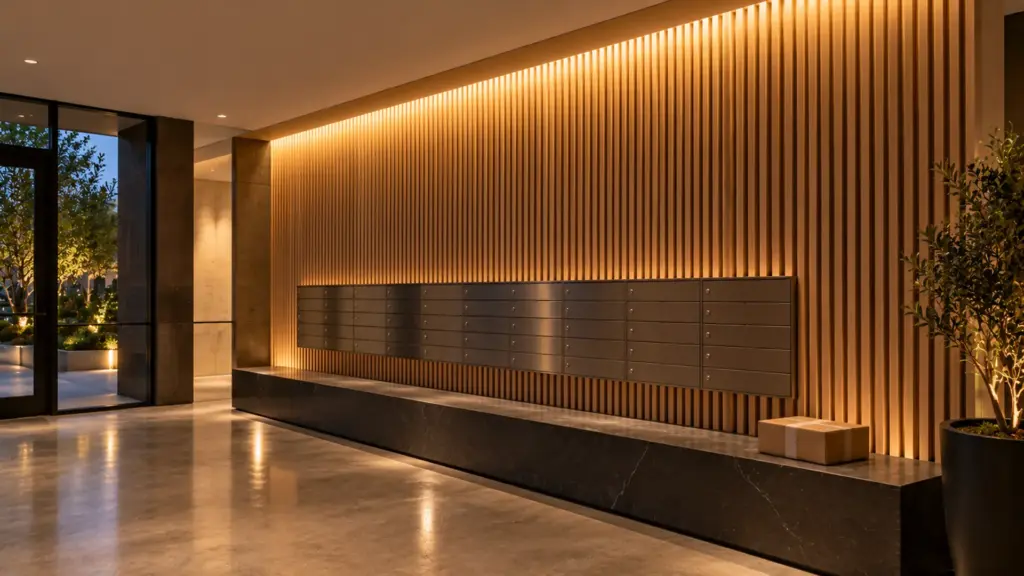
- A wash across the slats. A strip in a hidden pocket at the top or bottom of the wall grazes down or up across the slats. The light catches the slat edges and the wood grain and leaves the grooves in shadow. It is the softest look and the most forgiving.
- Behind the panel. The slat panel stands off the wall on a frame, and a strip around its back edge throws a halo onto the wall behind. The slats themselves stay dark; the panel floats.
Choose the placement with the designer before choosing a strip. The three need different strips, different power plans and different details.
Fit the Strip to the Groove
For lighting in the grooves, the groove sets the strip. Measure the actual gap and depth between slats on the panels being bought, not the catalog drawing. According to LEDSpace’s guide to the Blaq Aura system, one common panel format has grooves about 13 mm wide and 8 mm deep. Other panels differ, and acoustic panels often have narrower gaps.
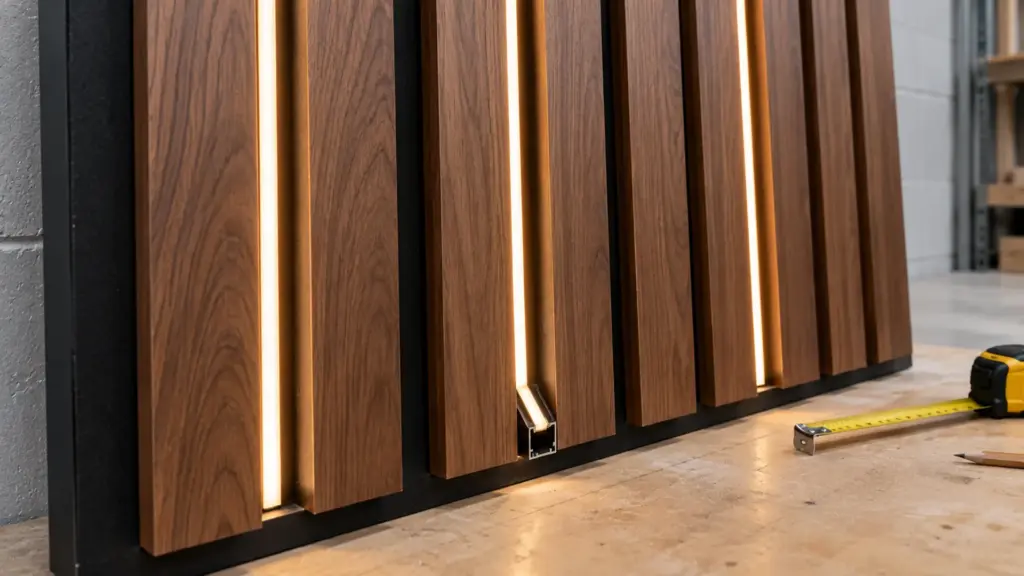
The rule: the strip, and any channel around it, must sit below the slat faces, so nobody sees it from an angle. That means:
- Grooves around 8 mm wide or less: an ultra-narrow COB strip such as our UT-C400-3, 2.7 to 3 mm wide, or the 4 to 5 mm UT-C400-5, laid in the bottom of the groove. Our guide to side-emitting, S-bend and ultra-narrow strip covers these forms.
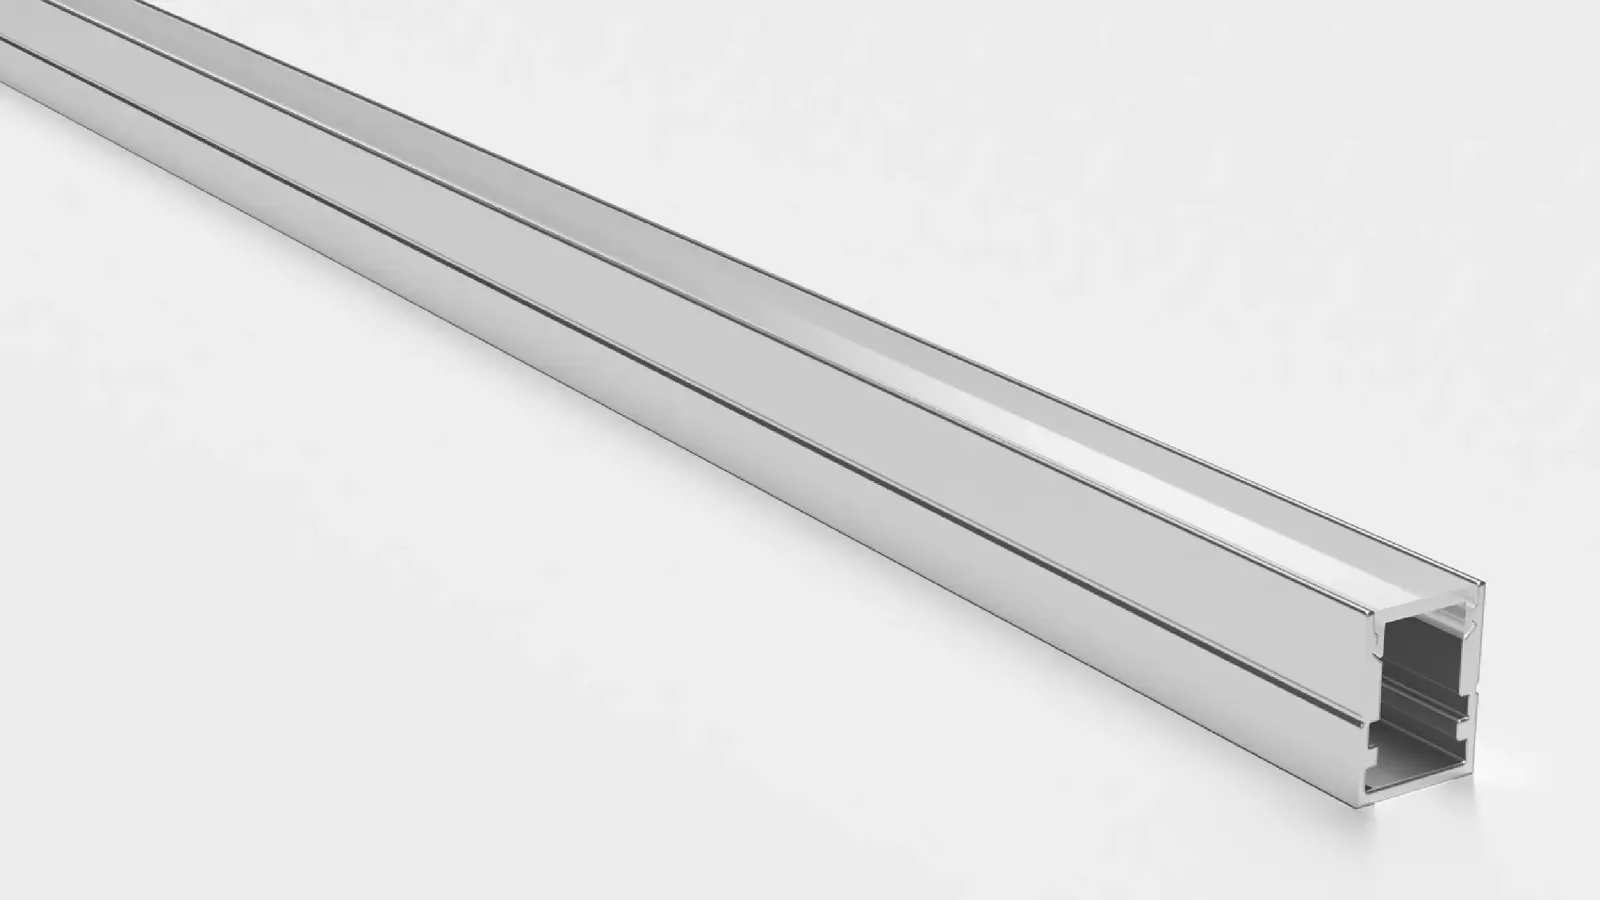
- Grooves around 13 mm wide and 8 mm deep: a compact channel fits. On paper our UT-CH1207 surface channel, 12 by 7 mm and taking strip up to 8 mm, sits inside a 13 by 8 mm groove; check the real groove tolerance with a sample before ordering.
- Shallow grooves: if there is not enough depth for a channel below the face, use a strip alone with an adhesive suited to the backing, or change the placement to a wash.
Use COB in grooves. A groove line is seen face-on, often from close up, and an SMD strip shows its dots. A dot-free COB line reads as one continuous line, which is what the designer drew.
Dots, Glare and the Black Felt Backing
Many acoustic slat panels have slats glued to a black felt backing. That backing changes how the light looks.
- It hides the strip when off. According to Inspired LED, its FlexFit silicone lens press-fits the 0.51 in channel of black-backed panels and blends with the backing when the lights are off. A black strip body or a black channel does the same job.
- It absorbs light. The groove line on black felt looks crisp but lights the room very little. Treat groove lighting as an accent, not as the light for the space.
- It shows dust. Felt and dark finishes show dust on any flat surface in the groove, including the top of a channel.
According to LEDSpace’s comparison of flexible silicone channels, problems reported with silicone in slat grooves include glossy reflections, dust clinging to the surface, visible hotspots and channels working loose from the timber. Whatever holds the strip, it must be fixed firmly and have a matte face. If dots show through a cover in a groove, our guide to LED dots through a diffuser explains the depth-to-pitch rule that decides it.
Wood, Felt and Heat
Slat walls put strip close to wood and felt, so keep the heat low.
- Use low watts per foot in grooves. The UT-C400-3 runs 2.1 W/ft. That is enough for an accent line and leaves little heat to manage.
- Use a channel where the strip lies on felt. Felt insulates, and a strip on felt has nowhere to put its heat. An aluminum channel spreads it and gives the adhesive a stable surface; our guide on whether LED tape needs a channel explains when the instructions require one.
- Keep drivers out of the panels. A driver behind a slat panel on a felt backing is in a sealed, insulated box. Put drivers where they can breathe and be reached.
Wash lighting at the top or bottom uses a higher-output strip, for example the 8 mm UT-C480-8 at 3.2 W/ft, in a pocket with air and an aluminum channel.
Power: Many Short Runs, One Plan
A slat wall in groove lighting is many short runs side by side. That changes the power plan.
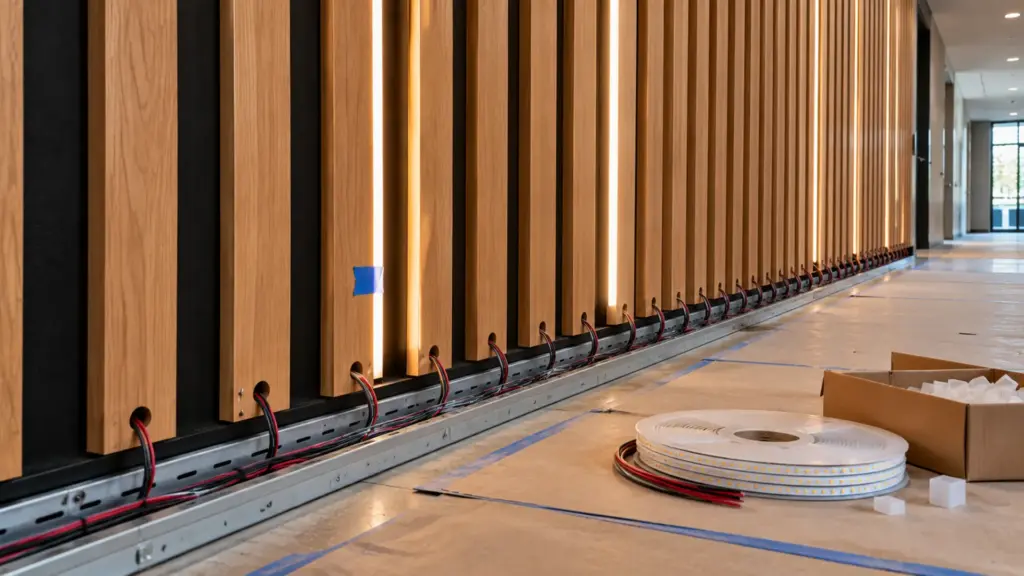
Take a wall 8 ft tall with 24 lit grooves, each holding 8 ft of UT-C400-3 at 2.1 W/ft:
- Per groove: 8 ft × 2.1 W/ft = 16.8 W.
- Whole wall: 24 × 16.8 W ≈ 403 W.
- Per 60 W Class 2 driver at 80 percent (48 W): two grooves (33.6 W) fit; three (50.4 W) do not.
- Drivers: 24 grooves ÷ 2 = 12 drivers.
Each groove is well within the 16 ft run per feed for that strip, so voltage drop is not the issue; the number of feeds is. Twenty-four feeds have to reach the bottom or top of 24 grooves, out of sight. Our guide on how to size an LED strip power supply explains the 80 percent rule used above.
Plan the feeds before the slats go up:
- Feed from one end of every groove, all from the same end, so the cable route is a single horizontal run behind a base or head detail.
- Drill or route the backing for each feed at the shop drawing stage, not with the panels on the wall.
- Group grooves by driver in pairs or threes as the load allows, and label each group.
- Bring the low-voltage cables to a reachable driver location above an access panel, in a closet or in a ventilated base cabinet.
- Wire to a diagram. Our LED strip wiring diagram guide shows parallel feeds from one driver.
According to the Blaq Aura guide, the sequence that works is: set the panels, route the cables, test the strips, then seat them. Testing before seating saves pulling a strip out of a finished groove.
Dimming and Controls for a Feature Wall
A slat wall is usually a feature, and features look best a little below full output. Groove lines at full brightness on a black backing can look harsh in the evening, while the same lines at half output read as a calm pattern. Plan the wall to dim.
- Put the wall on its own zone. The groove lines or the wash should not share a control with the room’s general lighting, so the wall can be set separately for day and evening.
- Use dimming drivers. A 0-10V Class 2 driver such as our UT-D60-24-C2-010 carries 60 W per driver like the non-dimming version, so the driver count above does not change; only the control wiring is added.
- Dim all groups together. Twelve drivers on one 0-10V control pair dim in step. Grooves on drivers with different dimming curves drift apart at low levels, which shows instantly on a wall of parallel lines.
- Test the low end on the mockup. Check that every groove is still even, and that no groove flickers, at the lowest level the design will use.
If the wall is in a space with an energy code control requirement, the separate zone often satisfies it as well. Our driver and controller range lists the dimming drivers.
Ends, Corners and Doors in the Wall
The wall’s edges are where groove lighting looks unfinished.
- Equal lengths. Cut every groove strip to the same length so the lines end in a straight row. According to Signlite, cutting to the same length is what gives a uniform look. The UT-C400-3 cuts every 0.39 or 0.79 in, so the ends can be matched closely.
- Dark ends. Leave a small, equal gap at each end of a groove rather than trying to light to the very edge, where the end cap or solder joint would show.
- Doors and openings. Where grooves stop at a door frame, either stop all strips in that zone at the same height above the frame or omit those grooves. A row of lines ending at random lengths above a door is the detail people notice first.
- Outside corners. Slats wrapping a corner need the groove lines to meet at the corner. Mock up the corner, because the strip cannot bend sharply around it.
Mock Up One Panel First
Before the order, build one full-height panel with the real slats, the real backing, the chosen strip and the channel, wired as specified.
Look at it lit and unlit, straight on and from the angles people will see it at. Check that the strip and channel disappear when off, that no dots show when on, that the lines are equal, and that the brightness suits the room at the planned dimming level. Then sign it off with the designer and keep it as the reference for the whole wall.
Spec Notes for This Wall
- Placement chosen first: in the grooves, a wash, or behind the panel.
- Groove measured on the real panels; strip and channel sit below the slat faces.
- COB in grooves, so the lines are dot-free; low watts per foot near felt and wood.
- Matte, firmly fixed channel or strip; black where the backing is black.
- One feed per groove from the same end, backing pre-drilled, drivers reachable.
- Equal strip lengths, equal dark ends, a planned detail at doors and corners.
- One full panel mocked up and signed off.
We supply narrow COB strip, compact channels and Class 2 drivers for slat walls on commercial and multifamily projects. Send the panel drawing, the groove size and the wall elevation, and we will match the strip and channel to the groove and lay out the feeds and drivers: request a quote. Channel sizes are on our LED channels and diffusers page.