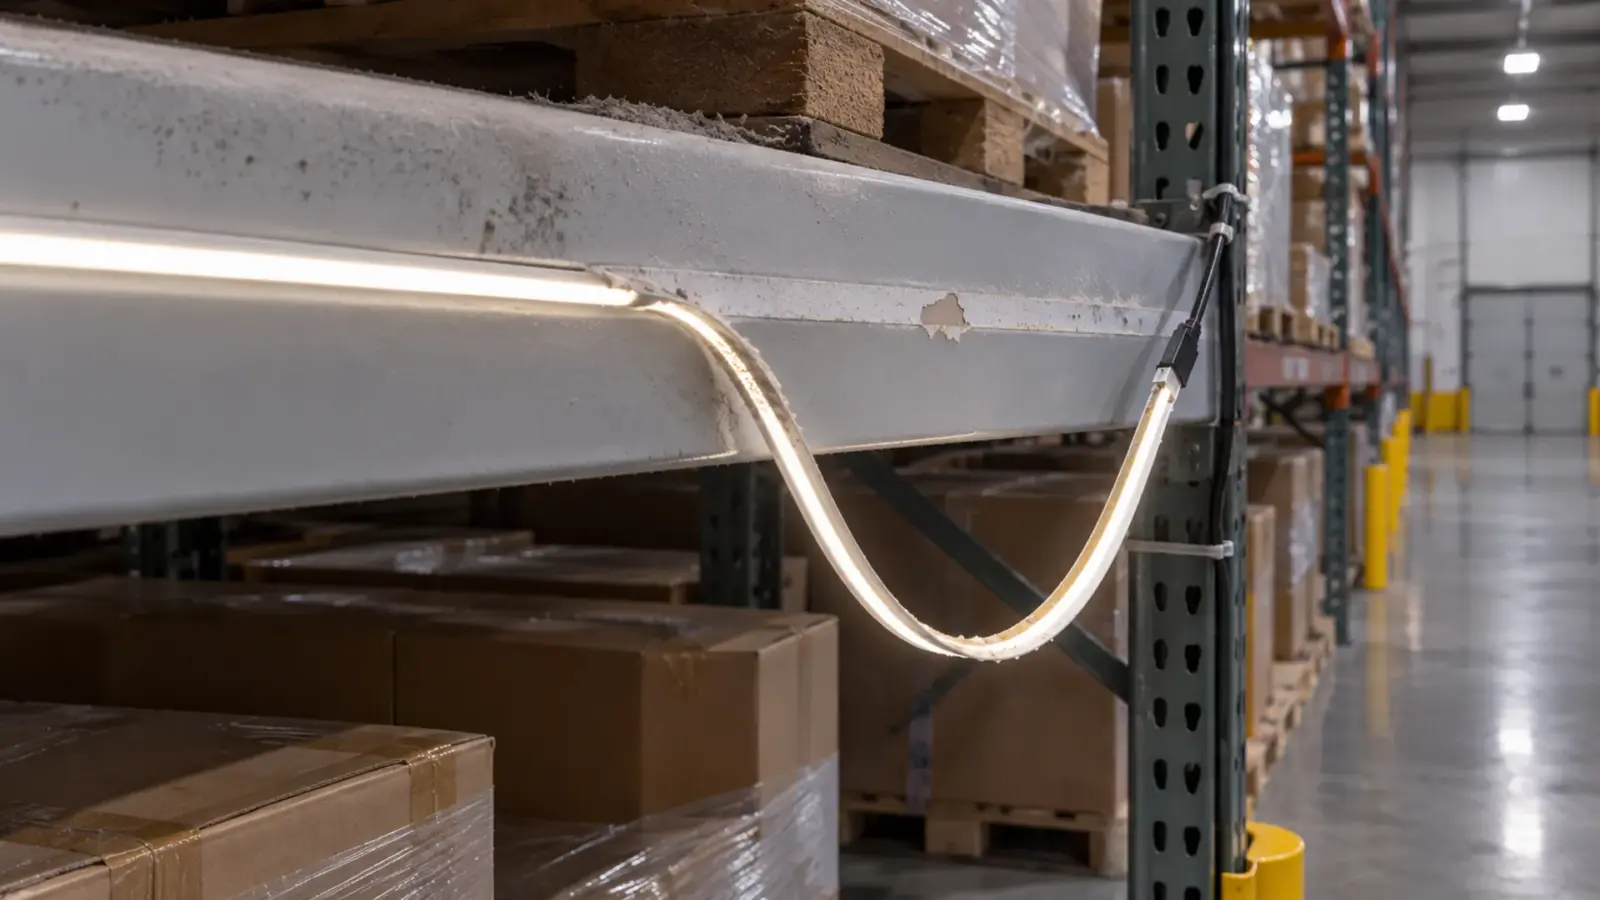
LED strip adhesive lets go when the surface is dirty, porous or warm, or when the tape carries a load it was not made to carry. Clean the surface, avoid dusty paint, keep the heat down and let a channel or clips carry the weight, so the tape only positions the strip.
The strip held through the walkthrough. Three months later the end of a run hangs a foot below the shelf, and the one beside it is on the floor. The tape did what tape does, and the specification asked it to do something else. This article sorts the causes, shows the fixes in the order that works and ends with what to write in the submittal.
Why the Tape Lets Go
Most failures trace to one of five causes, and each has a different fix.
| Cause | What you see | Fix |
|---|---|---|
| Dirty or oily surface | The strip peels off cleanly in a few days | Wipe with isopropyl alcohol and let it dry |
| Dusty or textured paint | The tape lifts with a layer of paint on it | Clean, seal or scuff the surface, or fix mechanically |
| Heat | The tape softens and the strip slides or sags | Reduce the load, add metal, add a channel |
| Weight and tension | Long runs and leads pull the end down | Support the run, and let a channel carry it |
| Moisture or cold at install | The strip never bonded | Install on a dry, warm surface |
According to LEDYi and BLT Direct, dust, grease and oil weaken the bond, and the surface should be cleaned with isopropyl alcohol and left to dry fully before the strip goes on. One vendor describes painted, textured drywall as porous and dusty, so that the tape grabs the surface layer and not the wall; scuffing with fine sandpaper is suggested. That is a secondhand point, so verify it with the adhesive maker’s data. We did not find the manufacturer’s numbers for surface energy, primers or application temperature in what we reviewed, and we do not state any here: read the adhesive maker’s sheet for the tape on your strip.
Prepare the Surface
Surface preparation is cheap and is where most callbacks start. Work through four steps.
- Remove what is on it. Dust, drywall powder, oil from a hand, a layer of cleaning product. Wipe with isopropyl alcohol on a clean cloth and change the cloth as it dirties.
- Let it dry. An alcohol film is not a surface; wait until it has gone.
- Look at the paint. A flat, dusty paint, a fresh coat that has not cured or a textured finish means the tape is bonding to paint and not to the wall. Fix the surface, or go to a mechanical hold.
- Press the strip on along its whole length. Firm pressure for the full run, not only at the ends.
Checkpoint: the strip is down on a clean, dry, sound surface and has been pressed along its length. If any step cannot be done, go to the next section.
Let the Channel Carry It
The most reliable fix is to stop asking the tape to hold the strip. According to Hitlights, letting a rigid channel or frame carry the weight turns the adhesive into a secondary hold and sharply cuts the risk of detachment. That matches our own rule for commercial jobs: the channel is fixed with screws or clips to the substrate, and the strip sits in it.
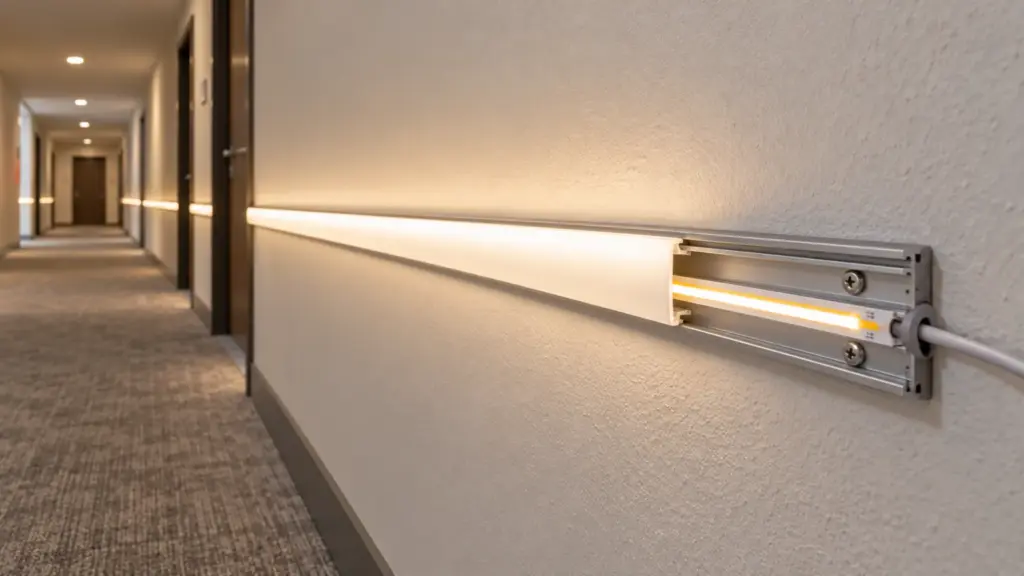
Our channel and diffuser range is built for this. Surface profiles clip or screw to the finished surface, recessed profiles are fixed into the substrate, and mounting clips for PCB widths from 8 to 20 mm are listed among the accessories on our drivers page. In a channel the strip stays straight, loses less heat and can be replaced without peeling. The channel itself is fixed by screws on a regular pitch, and the tape holds the strip against the channel floor.
Our guide on whether LED tape needs a channel covers the code question and the adhesive point in the same place.
Substrates, Compared
Different surfaces fail in different ways. The table is a planning aid based on how the sources describe surfaces and on general practice; it is not an adhesion rating, and the adhesive maker’s data decides.
| Surface | What to expect | What to do |
|---|---|---|
| Flat painted drywall, cured and clean | Often fine for a light strip, with the dust risk above | Clean, test, and use a channel for a long run |
| Textured or dusty paint | The tape bonds to the paint layer | Seal or fix mechanically |
| Sealed wood or laminate | Usually bonds well when clean | Clean, test, and keep heat low |
| Raw wood or unsealed board | Porous, can shed dust and oils | Seal it, or fix mechanically |
| Bare metal or an aluminum channel | A good bond when cleaned of oil | Clean and press along the length |
| Glass, stone, tile | Smooth and clean; can be cold or wet | Dry it, warm it, and test first |
Where a surface is on the doubtful side, do not try to fix the tape. Fix the strip to a channel and fix the channel to the surface.
Vertical, Overhead and Curved Runs
Gravity works on the tape in all three. A strip on a vertical face slides, a strip on a ceiling peels from the end, and a strip on a curve is pulled off by its own stiffness. The strip’s weight is small, and the leads, connectors and driver cable add to it. Treat each as a case for clips or a channel: on a vertical run fix at a regular pitch from top to bottom; on an overhead run fix the end and the first stretch; on a curve, use a channel formed to the curve, or clips on the outside of it. We do not publish a clip pitch, because it depends on the strip, the surface and the load, and a mock-up on the real surface proves it. Write the pitch you prove into the submittal so the installer on the second floor uses the same one as the installer on the first.
Damp and Cold Rooms
A cold wall, a damp wall or a kitchen full of fat and steam all defeat tape. Water in the surface prevents bonding, a cold wall chills the adhesive and grease contaminates it. For these rooms, use a channel and clips, and keep the strip off the wall surface itself. Our wet location guide covers the moisture side, and the outdoor strip page lists sealed series for locations where the strip itself sees water.
Heat and the Tape
A strip is a heater, and the tape is under it. According to a vendor source, excessive heat damages the stickiness of the double-sided tape, and narrow, unventilated channels are a particular risk. The arithmetic shows the scale. A 16 ft run of UT-C480-8 draws 3.2 W/ft, or about 51 W, and almost all of it ends up as heat in the board, the tape and whatever the strip is stuck to.
Reduce it three ways. Choose a lower-wattage strip where the light level allows; mount on aluminum so the heat has a path; and avoid closing the strip in a sealed pocket. Our thermal management guide works through why a high-watt strip needs metal behind it, and our guide to black or yellow LED strip covers what overheating does to the board.
Repairs That Make It Worse
When a strip has fallen, the quick repair is usually the wrong one. According to a vendor warning, cyanoacrylate, super glue, becomes brittle when it cures, and a rigid bond on a strip that flexes with heat will crack. Hot glue softens with the same heat that loosened the tape. Both leave a residue that makes a later proper fix harder.
Fix it properly: clean the surface and the back of the strip, remove old residue, and fix the run with clips or a channel. Replace the tape only where a clip cannot go. If a section has taken heat damage, check the board for brown or yellow patches before it goes back up, as in our troubleshooting guide.
Peel Test Before the Full Run
Before sticking 200 ft, test on the real surface. Apply a 12 in length of strip with the full preparation, leave it overnight and pull it at a shallow angle by hand. If it comes away, the surface or the tape is the problem, and the fix is found now and not on the ladder. Test the worst surface on the job, not the best: the textured wall, the freshly painted soffit, the warm side of the ceiling.
What to Write in the Submittal
A mounting method belongs in the submittal, with the other parts of the system. Write four lines: the substrate and its finish; the surface preparation; the support, which is the channel or clip model and its fixing pitch; and the role of the tape, positioning only. If the strip has no channel, write why, and what holds it. Our installation guide shows where mounting sits in the bench-to-ceiling sequence, and the cut and connect guide covers the cut ends.
Final Checks
Before the order, confirm the substrate and its finish, the cleaning method, the support (channel or clips and their pitch), the heat load of the run and the peel test on the worst surface. A strip held by a channel is held by screws. A strip held by tape alone is held by whatever the wall will give it, and a wall that gave enough on the day of the walkthrough may give less after a season of heat, dust and lead tension.